
이전 글에서 bootstrap 템플릿을 사용해서 페이지를 구성하였다.
하지만, 페이지마다 공통으로 사용하는 부분(사이드바, footer 등)에 대해서 일일이 찾아서 복사하며 개발하기는 시간이 오래걸린다.
그래서, 레이아웃을 사용해서 공통으로 사용되는 부분은 따로 layout 형식으로 관리하고자 하였고, Thymeleaf에서 제공하는 layout 라이브러리(thymeleaf layout dialect)가 있어서 사용해보기로 하였다.
개발환경
- IDE : IntelliJ IDEA
- OS : MAC OS
- SpringBoot : 2.4.4
- Java8
- Gradle
1. Dependency 추가
- https://mvnrepository.com/ 에서 thymeleaf layout dialect 을 검색해서 dependency를 추가합니다.
(해당 글에서는 2.4.1 버전을 사용하였습니다.)
- build.gradle 의 dependency 에 아래 의존성을 추가합니다.
implementation 'org.springframework.boot:spring-boot-starter-thymeleaf'
implementation group: 'nz.net.ultraq.thymeleaf', name: 'thymeleaf-layout-dialect', version: '2.4.1'
참고!!!
jdk(java)가 1.8보다 높은 경우 thymeleaf-layout-dialect에서 groovy관련 문제가 발생할 수 있다고 합니다.
이를 해결하기 위해, java version을 1.8로 변경해주시면 됩니다.
혹은, 11이상 사용시에는 thymeleaf layout dialect 의존성을 groovy 관련 된 것을 제거한
implementation group: 'com.github.zhanhb', name: 'thymeleaf-layout-dialect', version: '2.4.1'
로 수정해보시기 바랍니다.
2. 레이아웃 구성
- 레이아웃은 아래 그림과 같이 구성하겠습니다.
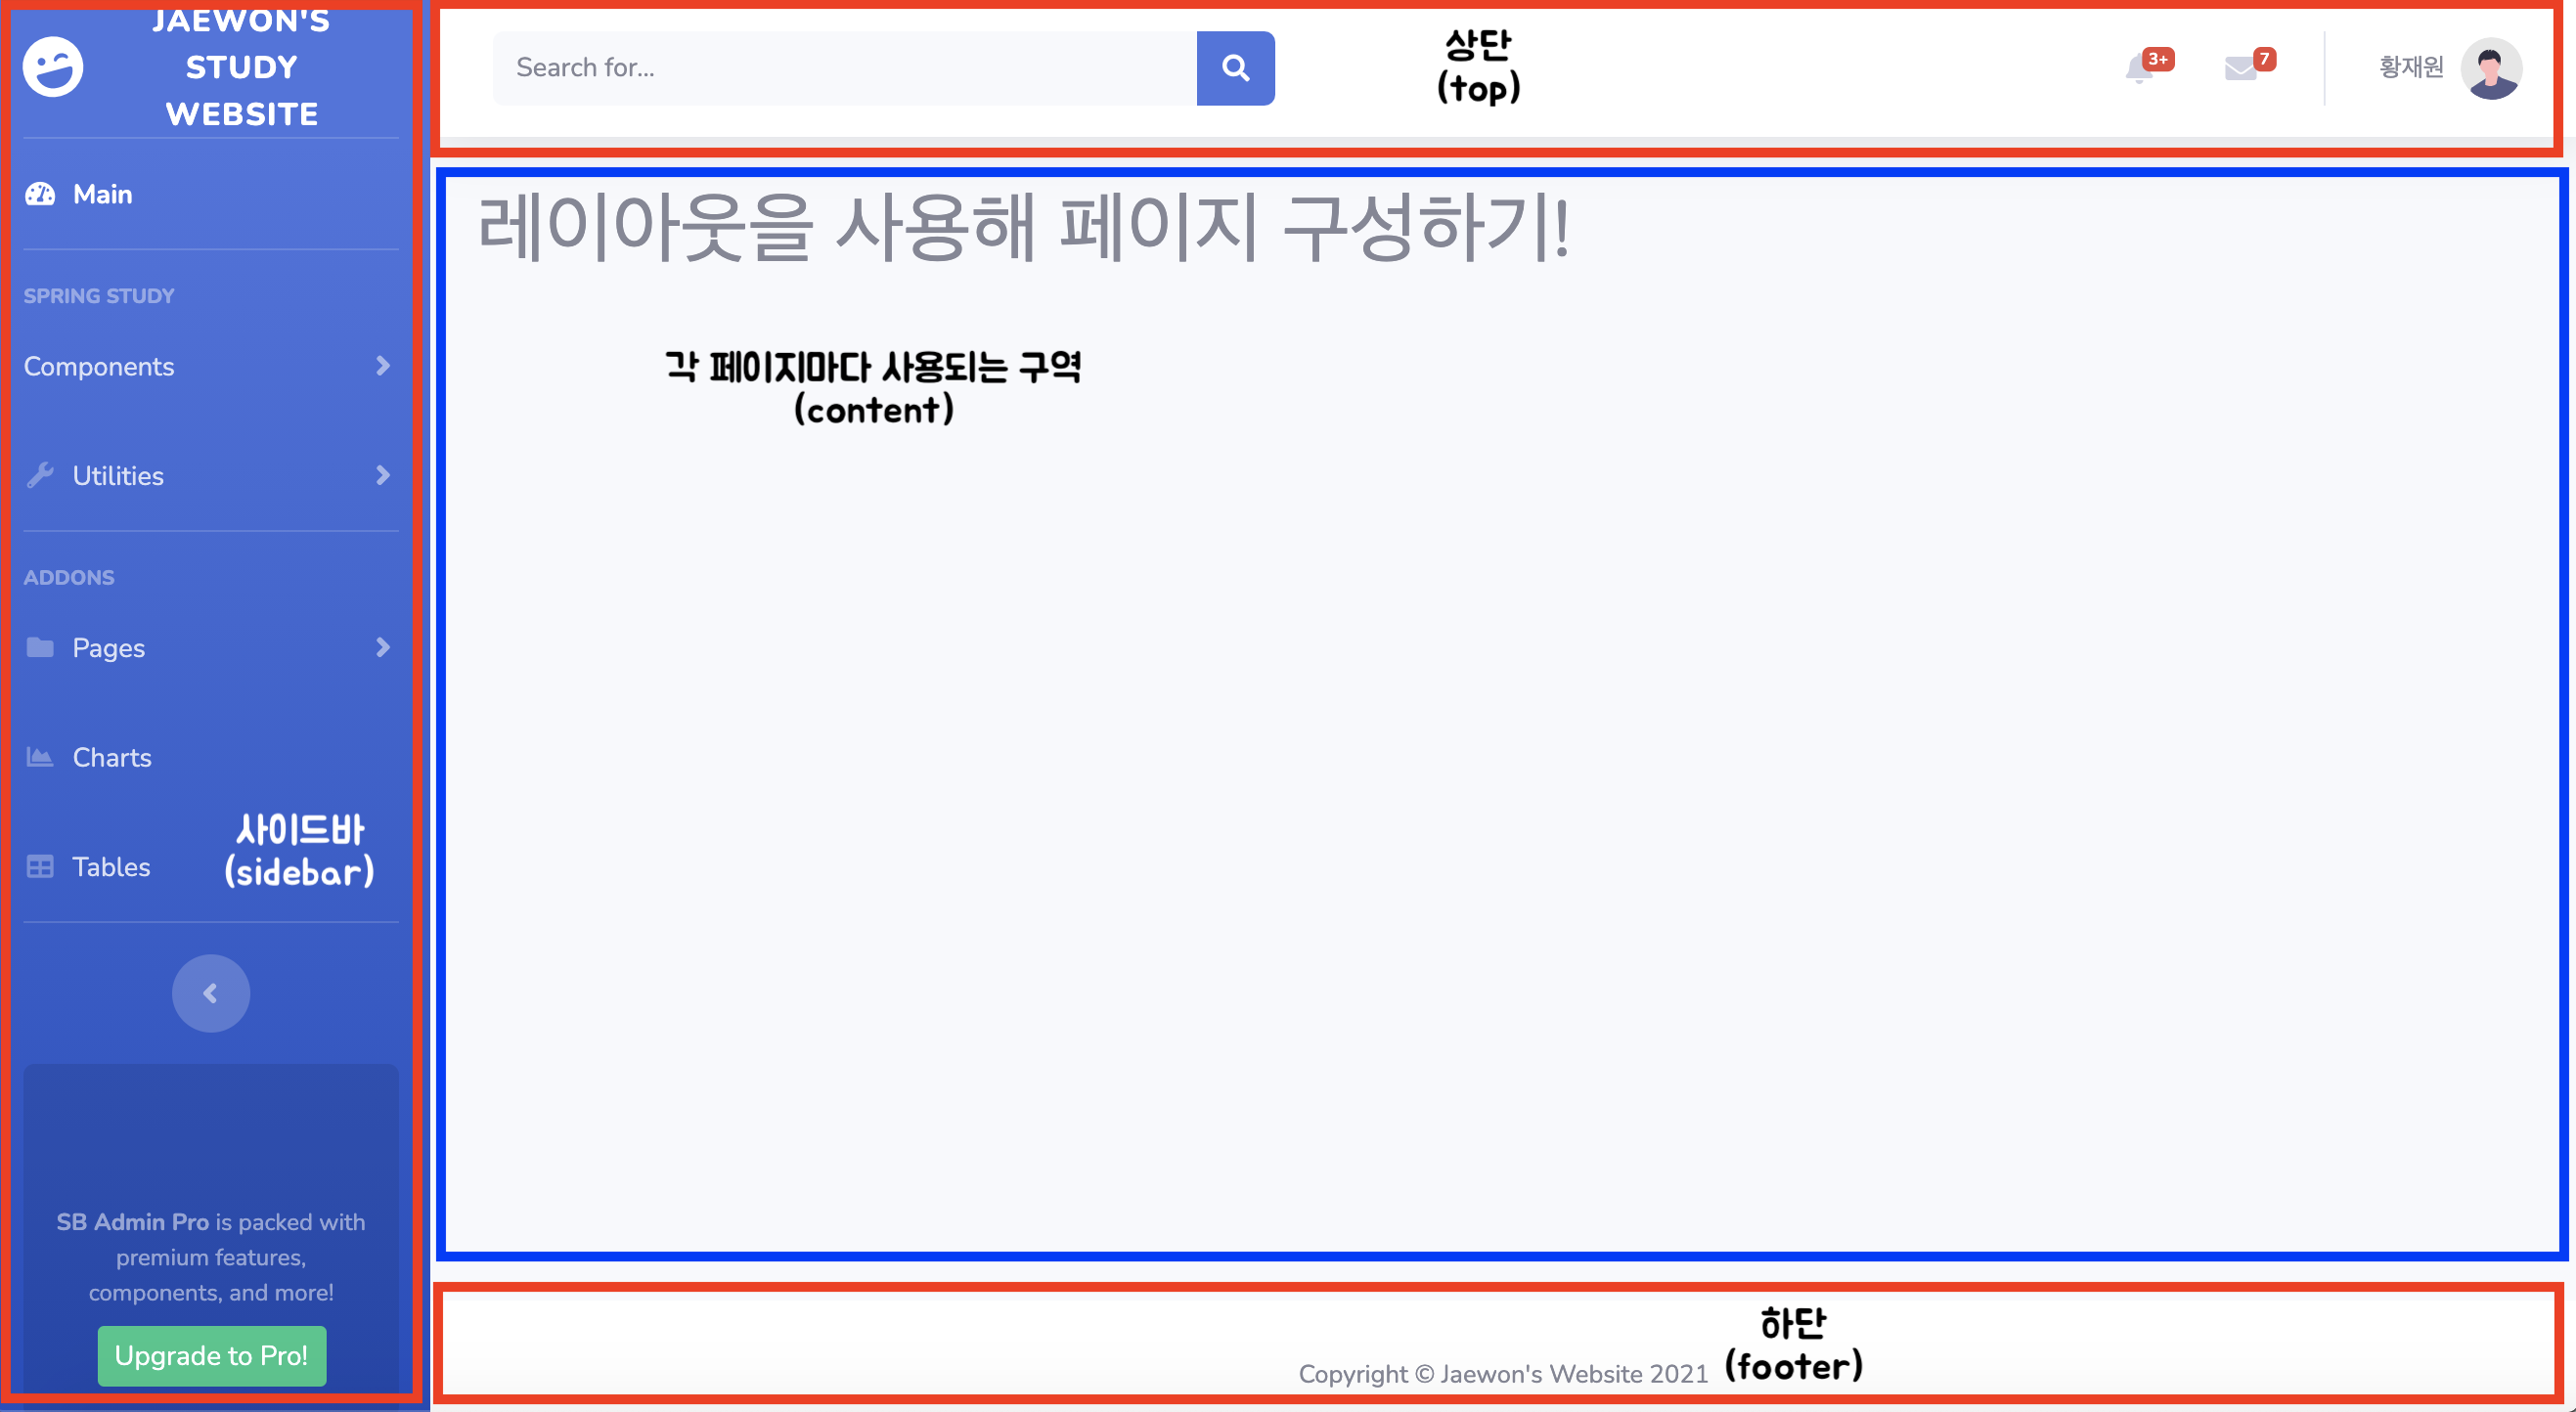
- 사이드바, 상단, 하단은 공통으로 모든 페이지에서 사용되는 곳이며, 가운데 content 부분은 각 페이지마다 바뀌는 곳이 됩니다.
- 디렉토리 구조는 아래 그림과 같이 구성하였습니다.
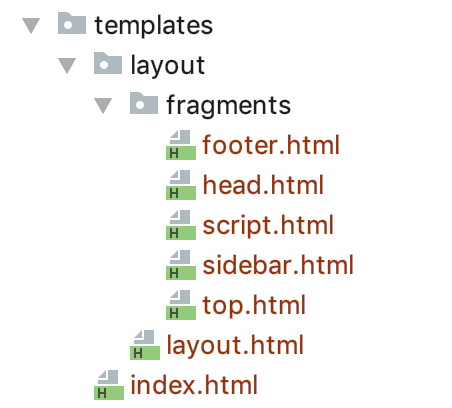
- templates 아래에 layout 디렉토리를 생성하고 그 아래에 fragments 디렉토리를 생성합니다.
- fragements 디렉토리는 공통으로 사용하는 각 부분 구성요소의 파일을 저장하겠습니다.
- layout 디렉토리 안에 layout.html은 fragments의 파일들을 하나의 layout의 파일로 사용되도록 하겠습니다.
- layout.html
<!DOCTYPE html>
<html lang="ko" xmlns:th="http://www.thymeleaf.org" xmlns:layout="http://www.ultraq.net.nz/thymeleaf/layout">

    <!-- 공통 헤드-->
    <th:block th:replace="/layout/fragments/head :: headFragment"></th:block>

    <body id="page-top">
        <div id="wrapper">
            <!-- 사이드바-->
            <th:block th:replace="/layout/fragments/sidebar :: sidebarFragment"></th:block>

            <div id="content-wrapper" class="d-flex flex-column">
                <div id="content">
                    <!-- 상단바-->
                    <th:block th:replace="/layout/fragments/top :: topbarFragment"></th:block>

                    <!-- 본문-->
                    <th:block layout:fragment="content"></th:block>
                </div>

                <!-- 공통 하단-->
                <th:block th:replace="/layout/fragments/footer :: footerFragment"></th:block>
            </div>
        </div>

        <!-- 공통 스크립트-->
        <th:block th:replace="/layout/fragments/script :: scriptFragment"></th:block>
    </body>
</html>
- 레이아웃을 구성하는 전체적인 틀입니다.
- 상단에 xmlns:layout="http://www.ultraq.net.nz/thymeleaf/layout" 으로 해당 파일을 기본 레이아웃으로 선언합니다.
- <th:block th:replace="/layout/fragments/head :: headFragment"></th:block> 은
/layout/fragments/head.html의 파일을 headFragment 이름으로 위치하겠다는 옵션입니다.
- 중간에 <th:block layout:fragment="content"></th:block> 은
해당 위치에 content라는 레이아웃 코드를 불러온다는 의미이며, 실제 page url에 따라 바뀔 부분이다.
참고!!!
아래 코드들은 이 글에서 사용한 템플릿에 있는 코드들이므로, 개발하시는 프로젝트에서 공통으로 사용되는 코드를 작성하시면 됩니다.
- head.html
<!DOCTYPE html>
<html lagn="ko" xmlns:th="http://www.thymeleaf.org">

    <!-- Head -->
    <th:block th:fragment="headFragment">
        <head>
            <meta charset="utf-8">
            <meta http-equiv="X-UA-Compatible" content="IE=edge">

            .... head 태그 코드 작성

            <link href="https://fonts.googleapis.com/css?family=Nunito:200,200i,300,300i,400,400i,600,600i,700,700i,800,800i,900,900i" rel="stylesheet" />
            <link th:href="@{/bootstrap/vendor/fontawesome-free/css/all.min.css}" rel="stylesheet" type="text/css" />
            <link th:href="@{/bootstrap/css/sb-admin-2.min.css}" rel="stylesheet" />

        </head>
    </th:block>
</html>
- <head></head> 안에 작성된 공통 코드를 작성합니다.
- <th:block th:fragment="headFragment"> 은
headFragment의 이름으로 공통 레이아웃에서 해당 이름(fragment)을 호출하여 해당 코드를 호출하도록 합니다.
위에서 작성한 layout.html에서 <th:block th:replace="/layout/fragments/head :: headFragment"></th:block>에 해당합니다.
- script.html
<!DOCTYPE html>
<html lagn="ko" xmlns:th="http://www.thymeleaf.org">

<!-- 공통으로 쓰이는 script 파일을넣는다.-->
<th:block th:fragment="scriptFragment">


    <!-- Bootstrap core JavaScript-->
    <script th:src="@{/bootstrap/vendor/jquery/jquery.min.js}"></script>
    <script th:src="@{/bootstrap/vendor/bootstrap/js/bootstrap.bundle.min.js}"></script>

	.... 스크립트 코드 작성

    <!-- Page level custom scripts -->
    <script th:src="@{/bootstrap/js/demo/chart-area-demo.js}"></script>
    <script th:src="@{/bootstrap/js/demo/chart-pie-demo.js}"></script>

</th:block>
</html>
- 공통으로 사용되는 script를 호출하는 코드를 작성합니다.
- top.html
<!DOCTYPE html>
<html lang="ko" xmlns:th="http://www.thymeleaf.org" xmlns:sec="http://www.w3.org/1999/xhtml">

<th:block th:fragment="topbarFragment">

    <!-- Topbar -->
    <nav class="navbar navbar-expand navbar-light bg-white topbar mb-4 static-top shadow">

        .... 상단 코드 작성

    </nav>

</th:block>
</html>
- 화면에서 상단(top)을 구성하는 코드를 작성합니다.
- footer.html
<!DOCTYPE html>
<html lagn="ko" xmlns:th="http://www.thymeleaf.org">

    <!-- Footer -->
    <th:block th:fragment="footerFragment">
        <footer class="sticky-footer bg-white">

            .... 하단(footer) 코드 작성

        </footer>
    </th:block>

</html>
- 화면에서 하단(footer)을 구성하는 코드를 작성합니다.
- sidebar.html
<!DOCTYPE html>
<html lang="ko" xmlns:th="http://www.thymeleaf.org">

<th:block th:fragment="sidebarFragment">

    <!-- Sidebar -->
    <ul class="navbar-nav bg-gradient-primary sidebar sidebar-dark accordion" id="accordionSidebar">

        .... 사이드바 코드 작성

    </ul>

</th:block>

</html>
- 화면에서 사이드바(sidebar)을 구성하는 코드를 작성합니다.
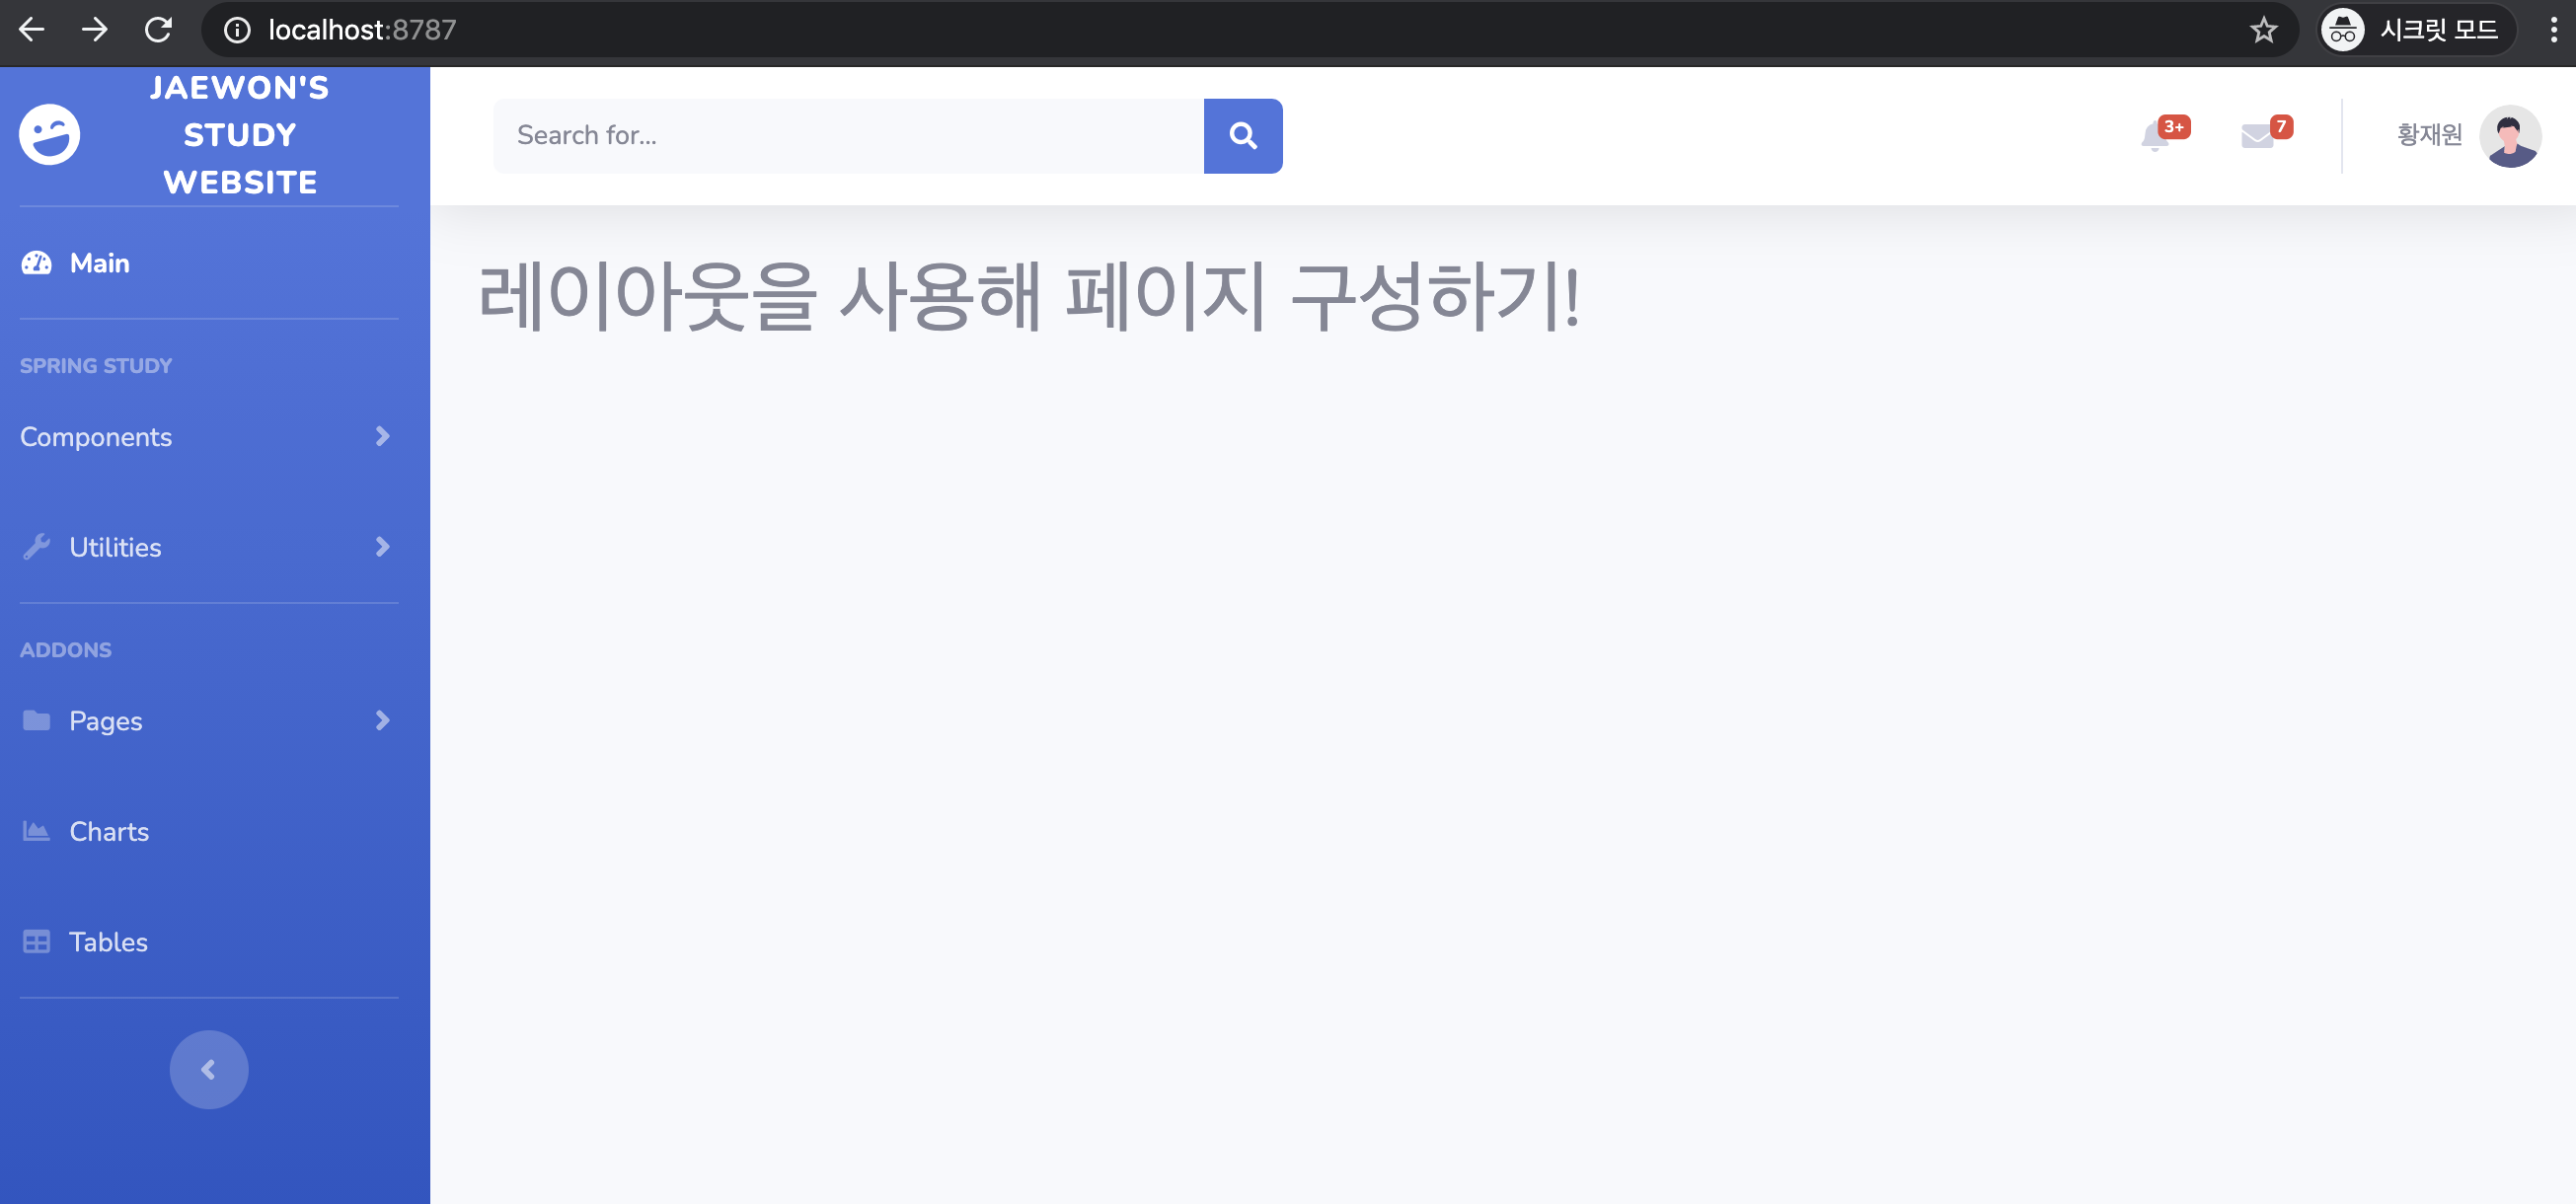
3. 프로젝트 실행
- 프로젝트를 실행합니다.
- index.html
<!DOCTYPE html>
<html xmlns:th="http://www.thymeleaf.org"
      xmlns:layout="http://www.ultraq.net.nz/thymeleaf/layout"
      layout:decorator="~{layout/layout}">
<!-- 최신 SpringBoot 에서는 layout:decorate="~{layout/layout}" 으로 사용 -->

<th:block layout:fragment="content">
    <!-- Begin Page Content -->
    <div class="container-fluid">
        <h1>레이아웃을 사용해 페이지 구성하기!</h1>
    </div>
</th:block>
</html>
- 상단에 layout:decorator="~{layout/layout}" 은 기본 레이아웃을 layout/layout.html 파일을 사용하겠다라는 선언하는 것 입니다.
2022-11-03 추가!!!
참고!!!
정확한 SpringBoot 버전은 확인하지 못하였지만, 최신 버전에서는 layout:decorator 가 Deprecated 되었습니다.
layout:decorate="~{layout/layout}" 으로 바꿔 사용하시면 됩니다.
- <th:block layout:fragment="content"> 아래에 코드를 작성하게 되면, layout.html에서 content라는 부분에 위치하도록 합니다.
- 각 파일마다 content 아래에 코드를 작성하시면서 개발을 하시면 됩니다.
- finish.html
<!DOCTYPE html>
<html xmlns:th="http://www.thymeleaf.org"
      xmlns:layout="http://www.ultraq.net.nz/thymeleaf/layout"
      layout:decorator="~{layout/layout}">

<th:block layout:fragment="content">
    <!-- Begin Page Content -->
    <div class="container-fluid">
        <h1>끝!!!!</h1>
    </div>
</th:block>
</html>
- / 경로로 들어오면 index.html이 /finish 경로로 들어오면 finish.html이 보여지도록 하였습니다.

'BackEnd > Spring' 카테고리의 다른 글
| [SpringBoot] 웹서비스 출시하기 - 1. AWS EC2 구축 (0) | 2021.04.10 |
|---|---|
| [SpringBoot] Google reCAPTCHA V2 사용하기 (2) | 2021.04.04 |
| [SpringBoot] BootStrap Templete 적용하기 (4) | 2021.04.03 |
| [SpringBoot] 프로젝트 생성하기(Intelli J, gradle) (0) | 2021.03.28 |
| [SpringBoot] Swagger(springfox) 사용하기 (0) | 2020.07.25 |